


A Personal Note Before We Continue
Before I continue this series, I want to briefly share why it took me so long to publish this second blog.
As many of you who follow me on LinkedIn already know, I lost my mum about six months ago, only nine months after I lost my dad. I was still trying to recover from those deeply painful losses when more devastating news arrived from Iran.
On 8 January 2026, reports started emerging of mass killings during the violent crackdown in Iran, and the situation continued for the following two days. Many people described those days with words that are hard even to repeat. Then the war involving Iran, Israel, and the United States escalated further, and it is still ongoing as I write this blog post.
I am trying not to stay in the dark, but I am human after all. Being surrounded by grief and bad news for such a long time takes a real toll, and dealing with it has simply been hard.
That said, I still wanted to continue this series. Partly because I believe the topic matters, and partly because getting back to writing feels like one small way to keep moving forward.
Quick Recap of Part 1
In the first blog of this series, I focused on the concepts and terminology behind Agentic AI in the context of Power BI and Microsoft Fabric. We looked at ideas such as agents, tools, skills, MCP, guardrails, memory, prompts, planning, and actions.
That first post was intentionally conceptual. I did not want to jump straight into tools and demos before building the right mental model. If the foundations are unclear, the setup work quickly turns into confusion.
This follow-up post is where we move from concepts into practice, starting with the environment setup.
What This Blog Will Cover
In this post, I want to keep the scope practical and narrow enough to remain useful. We will cover:
- why VS Code is a good starting point for agentic workflows
- how to get started with GitHub Copilot in VS Code
- which VS Code extensions make sense for Power BI and Microsoft Fabric work as of today (Apr 2026)
- why you should be careful with local MCP servers
- why Windows Sandbox or a virtual machine can be a very good idea before you start experimenting
- how to make sure GitHub Copilot, tools, and models are ready before you start a real workflow
There is already a lot in that list, so I will deliberately keep the hands-on Power BI modelling walkthrough for the next post.
Why VS Code Is a Good Starting Point for Agentic AI
VS Code is a very practical place to begin with agentic AI workflows. It is lightweight, extensible, well documented, and increasingly well integrated with GitHub Copilot. More importantly, it gives us a working environment where prompts, files, plans, tools, MCP-based capabilities, and extensions can all come together in one place, which is very handy.
For Power BI and Microsoft Fabric work, that matters a lot. We are usually not just asking random questions. We are trying to work with semantic models, project files, metadata, documentation, notebooks, configuration, and sometimes real environments. Therefore, we need a setup that can easily provide different mechanisms to access to Microsoft Fabric and Power BI in structured workflows. VS Code gives us exactly that.

A clean VS Code window ready for setup
Download and Install VS Code
If you do not already have VS Code installed, you have two ways to download it:
I am not going to explain the installation steps in this blog because that is not the focus here. The important point is simply to get VS Code installed and ready.
If you already use VS Code, make sure it is up to date before going further.

Official VS Code download options
Install the Power BI and Microsoft Fabric VS Code Extensions
Before we start using Copilot in an agentic way, we should make VS Code aware of the types of assets we care about. In other words, we want to extend VS Code so it understands Power BI semantic models, Fabric workspaces, notebooks, TMDL files, and related configurations that are native to those platforms. This way, Copilot operates with full context and awareness of the domain-specific structures it is working with. Before we go any further, let’s check what tools are already available for GitHub Copilot in VS Code*. To do so, simply click the *Config Tools* button available in the CHAT pane as shown in the following image:
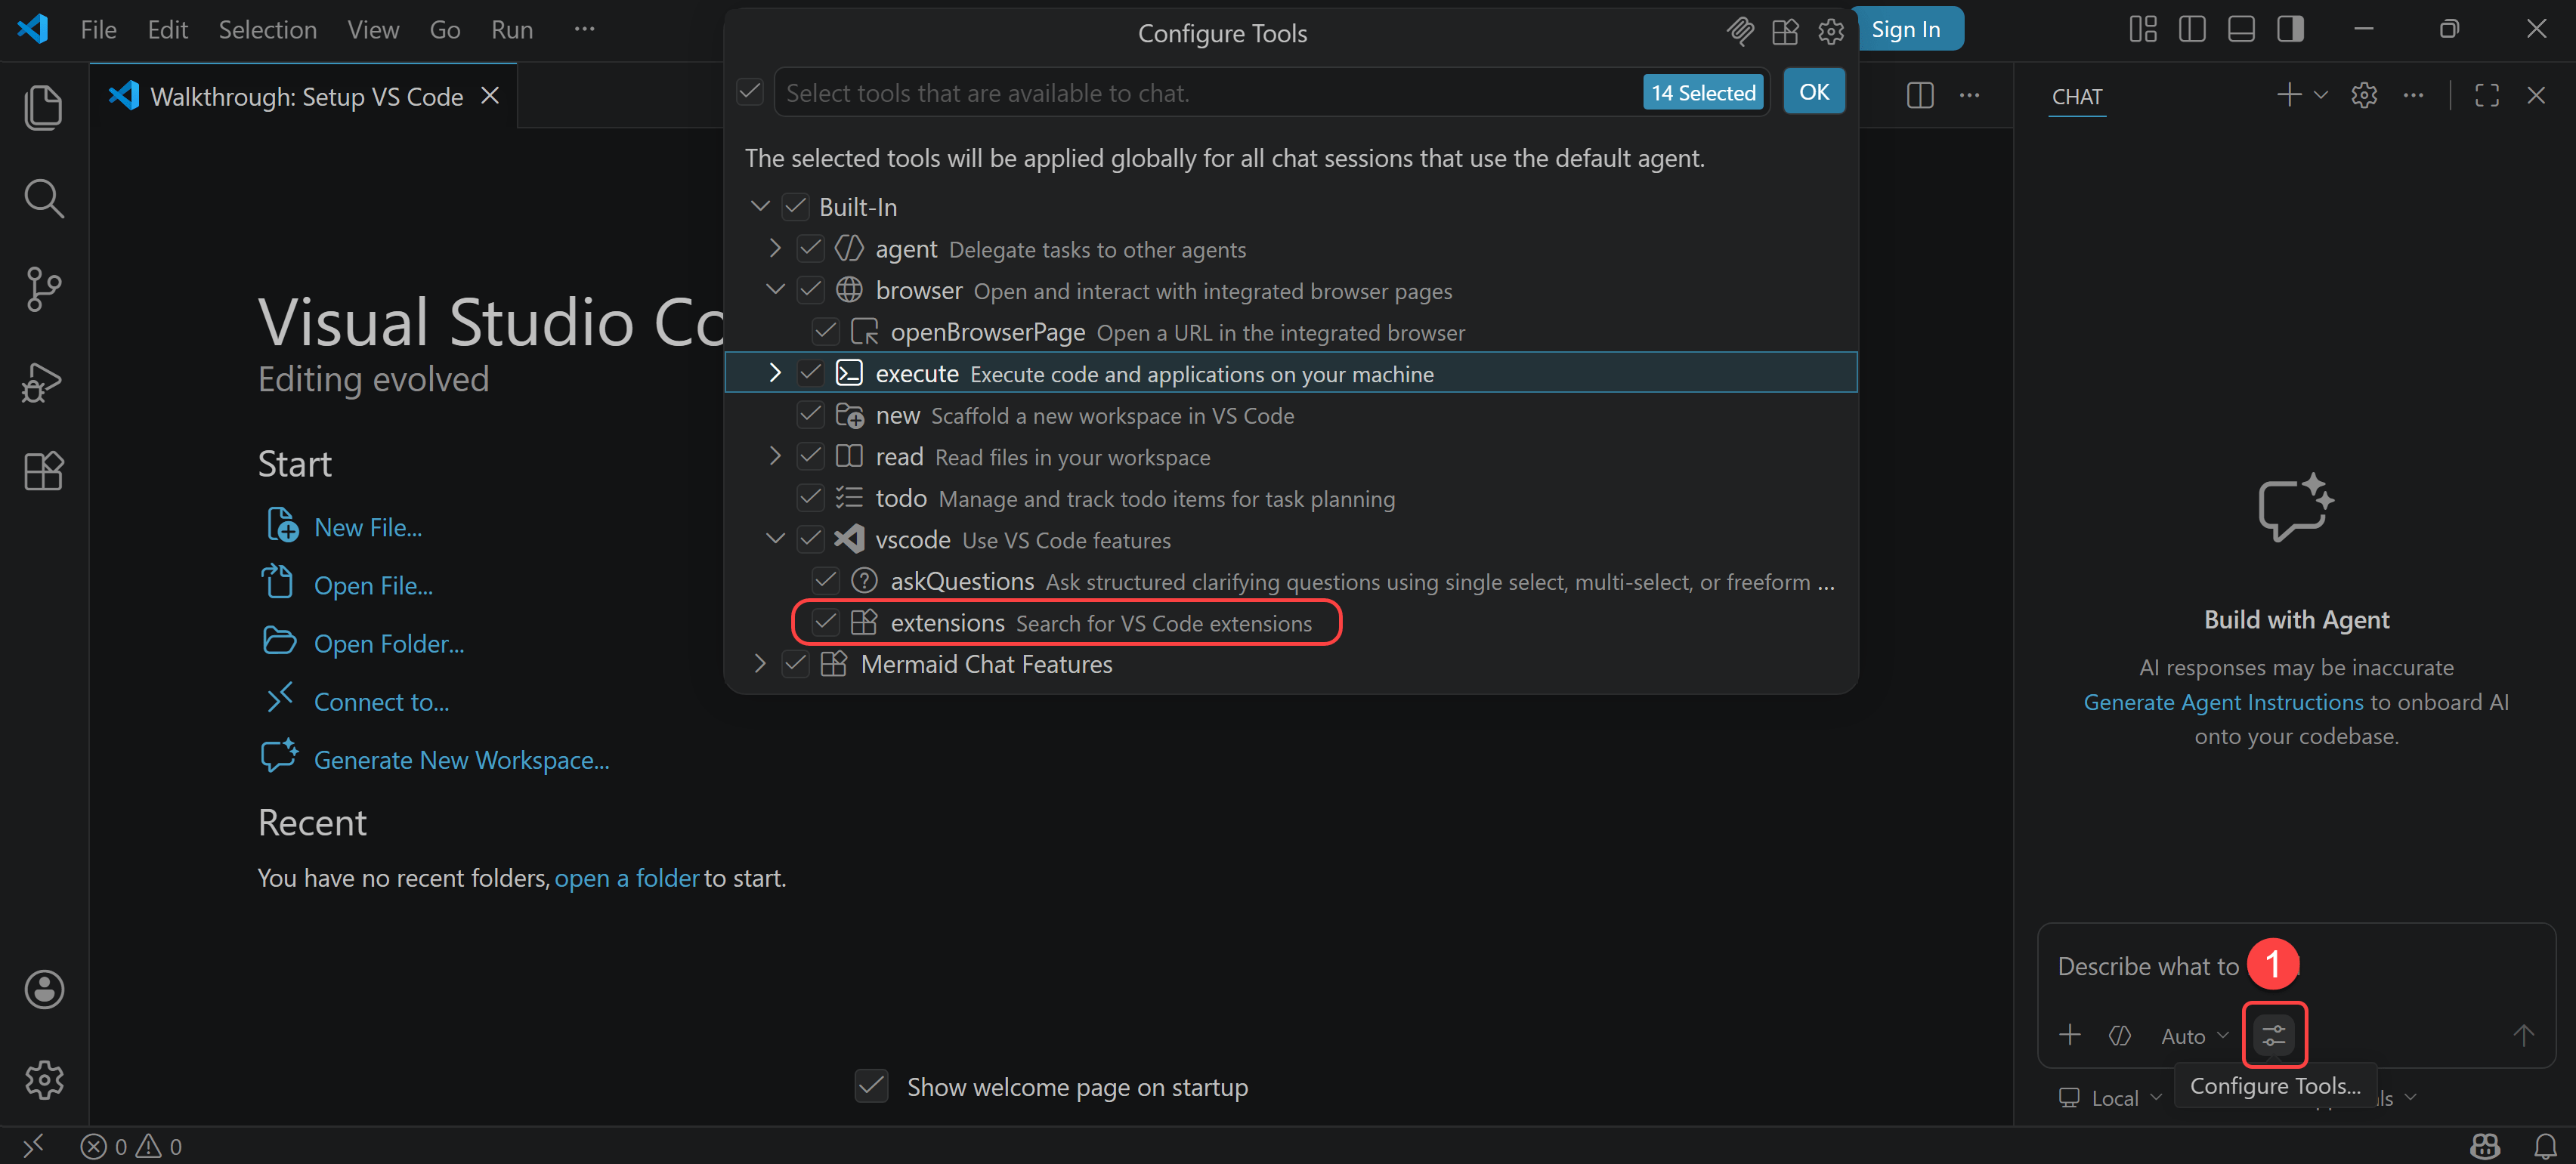
VS Code tools for Github Copilot
As you see VS Code has already exposed a wealthy set of tools to GitHub Copilot including the Extensions or the ability to execute code on our machine.
Why These Extensions Matter for Agentic Workflows
In Part 1, I explained that an agent becomes useful when it can work with tools instead of relying only on general conversation.
This is one of the reasons extensions matter. In the VS Code, extensions do not just add syntax colouring or convenience features. They can also add commands, contextual capabilities, and in some cases tool-like functionality that GitHub Copilot can use as part of a richer workflow.
In other words, the more relevant your workspace and editor capabilities are, the more grounded and useful your agentic setup becomes.
For Power BI and Fabric work, that means you want VS Code to understand the files, structures, and developer experiences that matter to those platforms.
Power BI and Fabric Extensions to Install
This part needs a more opinionated list now, especially after the newer MCP direction Microsoft showed at FabCon 2026. I suggest separating the setup into “Must Have” and “Nice to have” so the first-time experience stays focused and not too noisy.
Must Have
Start with Microsoft’s official VS Code extensions for Power BI and Fabric work:
- TMDL for working with semantic model code in a proper TMDL-aware editor experience
- Microsoft Fabric for browsing workspaces, opening item definitions, and working with Fabric items directly from VS Code
- Power Query / M Language for editing and understanding M code used in semantic models, dataflows, and related assets
For MCP servers, I would start with the official Microsoft options plus the modelling server you asked for:
- Fabric MCP Server: this is Microsoft’s local first, development-focused MCP server for Fabric. It is the best starting point for local agentic development because it gives your AI assistant access to Fabric API context, item definitions, OneLake operations, and best-practice guidance without directly operating against your live environment.
- Power BI Modeling MCP Server: this is the official local server for semantic model development. It is especially useful when you want agents to create or update measures, relationships, tables, and other model objects using TMDL-aware workflows. If I work only in Power BI projects this is the MCP server that I would include in my setup.
This combination gives you a practical split:
- VS Code extensions make the editor understand your files
- local MCP servers help with safe development and authoring
Nice to Have
After the core setup is working, I would add a small number of community tools that bring extra productivity:
- Fabric Studio by Gerhard Brueckl is a very useful companion for browsing Fabric items, editing definitions, and working with Fabric from inside VS Code in a more developer-friendly way.
- Power BI Studio by Gerhard Brueckl is also a strong addition if you do a lot of Power BI tenant and semantic model work from VS Code.
For MCP servers, these are good optional additions:
- Semantic Model MCP Server: It was a hard decision for to decide whether I put this MCP server in the must have list or the nice to have one. I have been using this MCP from the first week it was released and I have included it in my tool-belt since. But, after the Power BI Modeling MCP server was released, I gradually gave the space to the new one in my tool-belt. I am not a fan of having a massive tool-belt that gets heavy after a while and hurts my back 😊. But I strongly advise consider using it if you carryout a lot of performance tuning or want to audit your model against best practices specifically on your TMSL-oriented workflow. It is useful because it can inspect semantic models, execute DAX, retrieve legacy metadata, and run a healthy set of Best Practice Analyser style checks. If you are keen to know more about it or want me to provide a more detailed comparison between this MCP server and its winning rival, leave your comment in the comment section in this blog post.
- Fabric Remote MCP (Preview): Microsoft announced this at FabCon 2026 as a cloud-hosted MCP layer for authenticated Fabric operations. However, based on the current public Microsoft information, it is not currently available for public customer use through external MCP clients. So for now, I would only name it here as an important direction, but not include it as part of the setup steps.
- Power BI Remote MCP Server: this is an optional hosted Power BI MCP endpoint for specific read/query scenarios against existing semantic models (for example, when you want cloud-side insight generation without adding local model-authoring tools). If you want to know more about it, read more here.
- Microsoft Learn MCP Server: this is another nice to have reference MCP server for grounding the agent in official Microsoft documentation while you work through Power BI, Fabric, DAX, or M tasks.
My practical advice is simple: install the “Must Have” list first, verify that your editor and one local MCP server work correctly, then add the “Nice to have” tools one by one. This keeps the environment easier to trust and easier to troubleshoot.
Install Extensions and MCPs From VS Code Marketplace
Installing extensions and MCP servers from the VS Code Marketplace is super simple. You just need to either click the Extensions item from the Activity Bar or press Ctrl+Shift+X on your keyboard to open the Extensions pane on the side bar. The Extensions pane contains the following five views:
- Installed: This is the list of extensions that are already installed in your VS Code.
- Popular: This is the list of extensions that are currently popular among VS Code users.
- Recommended: This is the list of extensions that VS Code recommends based on your environment or workspace.
- MCP Servers: This is the view that shows MCP server integrations you can discover, install, or manage inside VS Code.
- Agent Plugins: This is the view that shows plugin-based additions for agent features in VS Code. This view might be hidden. If you do not see it, click the ellipsis button on the Extensions pane, then select Views -> Agent Plugins to make it visible.

VS Code Extensions
From here you can simply search the desired extensions and MCPs and install them. The following image shows the list of installed extensions and MCP servers:

Installed Extensions and MCPs in VS Code
Install External MCP Servers (Manual Setup Required)
At this point, it is important to mention something that can confuse people at the beginning.
Not every useful extension or MCP server is available in the VS Code Marketplace. In fact, in many real cases, the MCP server you want to use is not in the marketplace at all. Sometimes it is only available from a GitHub repository. Sometimes it is shared as source code, a package, a local executable, or a setup command that you need to run yourself.
So if the tool you need is not visible in the marketplace, that does not mean it does not exist. It usually just means you need to install it manually. This manual setup route is very common in the MCP world at the moment. It is not unusual, and in many cases it is actually the normal path for more technical or specialised MCP servers.
Marketplace MCP Servers vs External MCP Servers
From a user experience point of view, marketplace MCP servers are usually easier to start with. They are easier to discover, easier to install, and usually easier to update from inside VS Code itself. That makes them a very good starting point for beginners.
External MCP servers are different. They often require more effort because you may need to install prerequisites, clone a repository, run npm, pip, uv, or another package tool, configure environment variables, and then register the server in your editor or agent client manually.
That sounds harder, and to be honest, it is harder. But external MCP servers often give you much more flexibility as well.
The most important difference, in my view, is extendability.
When we install an external MCP server, we can inspect its code, understand how it works, and build on top of it. If the server is open source, we can fork it, add our own tools, change the behaviour or configuration, adjust the authentication flow, or adapt it to our organisation’s standards. In other words, we are not only a user of the MCP server, we can also become a contributor to it.
Doing something similar with a marketplace MCP server is often much less accessible. The marketplace experience is great for convenience, but it is usually not where you go when you want deep control or custom extension.
There are also a few other differences worth knowing:
- Discovery: Marketplace MCP servers are easier to find because they appear directly inside VS Code. External MCP servers usually require you to find them through documentation, GitHub, blog posts, conference talks, or community recommendations.
- Installation effort: Marketplace MCP servers are usually close to one-click installation. External MCP servers often need manual steps and a bit more technical confidence.
- Transparency: External MCP servers are often more transparent because you can inspect the repository, the dependencies, and sometimes even every tool definition. With marketplace items, that level of visibility may be less obvious to many users.
- Customisation: External MCP servers usually give you more room to customise behaviour, configuration, and supported tools. Marketplace MCP servers are usually more fixed in shape.
- Maintenance: Marketplace installs can feel easier to maintain because updates may be handled more smoothly inside the editor. External MCP servers may require you to pull changes, rebuild, or manage versions yourself.
- Governance and trust: Marketplace distribution can feel more familiar to users because it sits inside the editor experience. But external MCP servers can still be a better choice in professional teams when you want to review the source code, audit dependencies, and host or control the server yourself.
- Speed of innovation: External MCP servers often move faster because authors can ship changes directly without waiting for a marketplace-style packaging and publishing flow. This means you may get new capabilities earlier, but you may also need to deal with more change.
So which one should you choose?
My practical advice is simple. If a good marketplace option exists and it does what you need, start there. It is easier and usually enough for first experiments. But if you need deeper control, faster innovation, internal customisation, or the ability to extend the MCP server yourself, then the manual external route is often the better choice.
For Power BI and Microsoft Fabric work, I think it is worth becoming comfortable with both models. Marketplace tools are nice for convenience. External MCP servers are often where the more interesting and more powerful engineering possibilities start to appear. In this blog series I only use the marketplace MCP servers. If you want to know more about the external MCP servers, leave your comment in the comments section and I will do my best to prepare a blog or a YouTube video for it in the future.
Whichever path you choose, the next important step is making sure you test new MCP servers safely before trusting them on your main working environment, unless you fully trust the publisher.
Why We Should Test New Local MCP Servers in Isolation First
At this point, we have already gone through the extension setup and the basic process of installing MCP servers. So the question is where we should test them first. Before you install additional local MCP servers on your main machine, especially servers that can access local files, terminals, or development assets, it is worth slowing down for a moment. One of the easiest mistakes people make with agentic tooling is to get excited by what a new MCP server can do and then install it straight on their daily-use machine without much thought.
That is not always a good idea.
MCP servers are powerful because they bridge the gap between the agent and real systems. That is the whole point. But it also means you should be careful, especially when a server runs locally and has access to your machine, repositories, credentials, or workspace files. I am not saying you should be afraid of MCPs. I am saying you should treat them with the same engineering discipline you would apply to any other executable component that can touch the real systems.
For that reason, I strongly suggest that you first experiment in an isolated environment.
Option 1: Windows Sandbox
If you are on a supported Windows edition, Windows Sandbox is usually the fastest place to test a new local MCP server. It gives you a disposable Windows session that you can open quickly, try the setup, and throw away when you are done. For a first check, that is often enough. If you want a broader overview of how Windows Sandbox works, read more here.

VS Code running on Windows Sandbox
Option 2: Hyper-V Virtual Machines
If you want something more repeatable, a Hyper-V virtual machine is the better option. It takes more effort to prepare, but it lets you keep the environment, install tools once, and return to it later. That is useful if you plan to test several MCP servers or build a small lab setup. If you want a broader overview, read more here.

VS Code running on a Hyper-V VM
Windows Sandbox vs Hyper-V
To keep it simple:
- use Windows Sandbox if you want the quickest and easiest first test
- use Hyper-V if you want a persistent setup for repeated experiments
I do not want to go deeper into either option here, because this blog is about getting ready for Power BI and Fabric agentic work, not about Windows virtualisation.
Getting Started with GitHub Copilot in VS Code
Now that the extensions and MCP servers are installed, the next step is to get GitHub Copilot working inside VS Code. This is where the experience starts to feel practical. Now let’s get familiar with the UI a bit more. If you want the broader official product overview, learn more here.
Sign-in to GitHub from VS Code
Now I follow these steps:
- Click the Sign In button next to the Chat toggle
- Click the desired button to sign into GitHub
- Authorise VS Code to connect to GitHub
- On the This site is trying to open Visual Studio Code warning, click the Open button

Sign in to GitHub from VS Code
This opens VS Code signed in to GitHub. So far so good.
Check GitHub Usage
Before moving forward, let’s check out GitHub Copilot usage on VS Code. To do so, click the GitHub Usage on the bottom right corner of the VS Code:
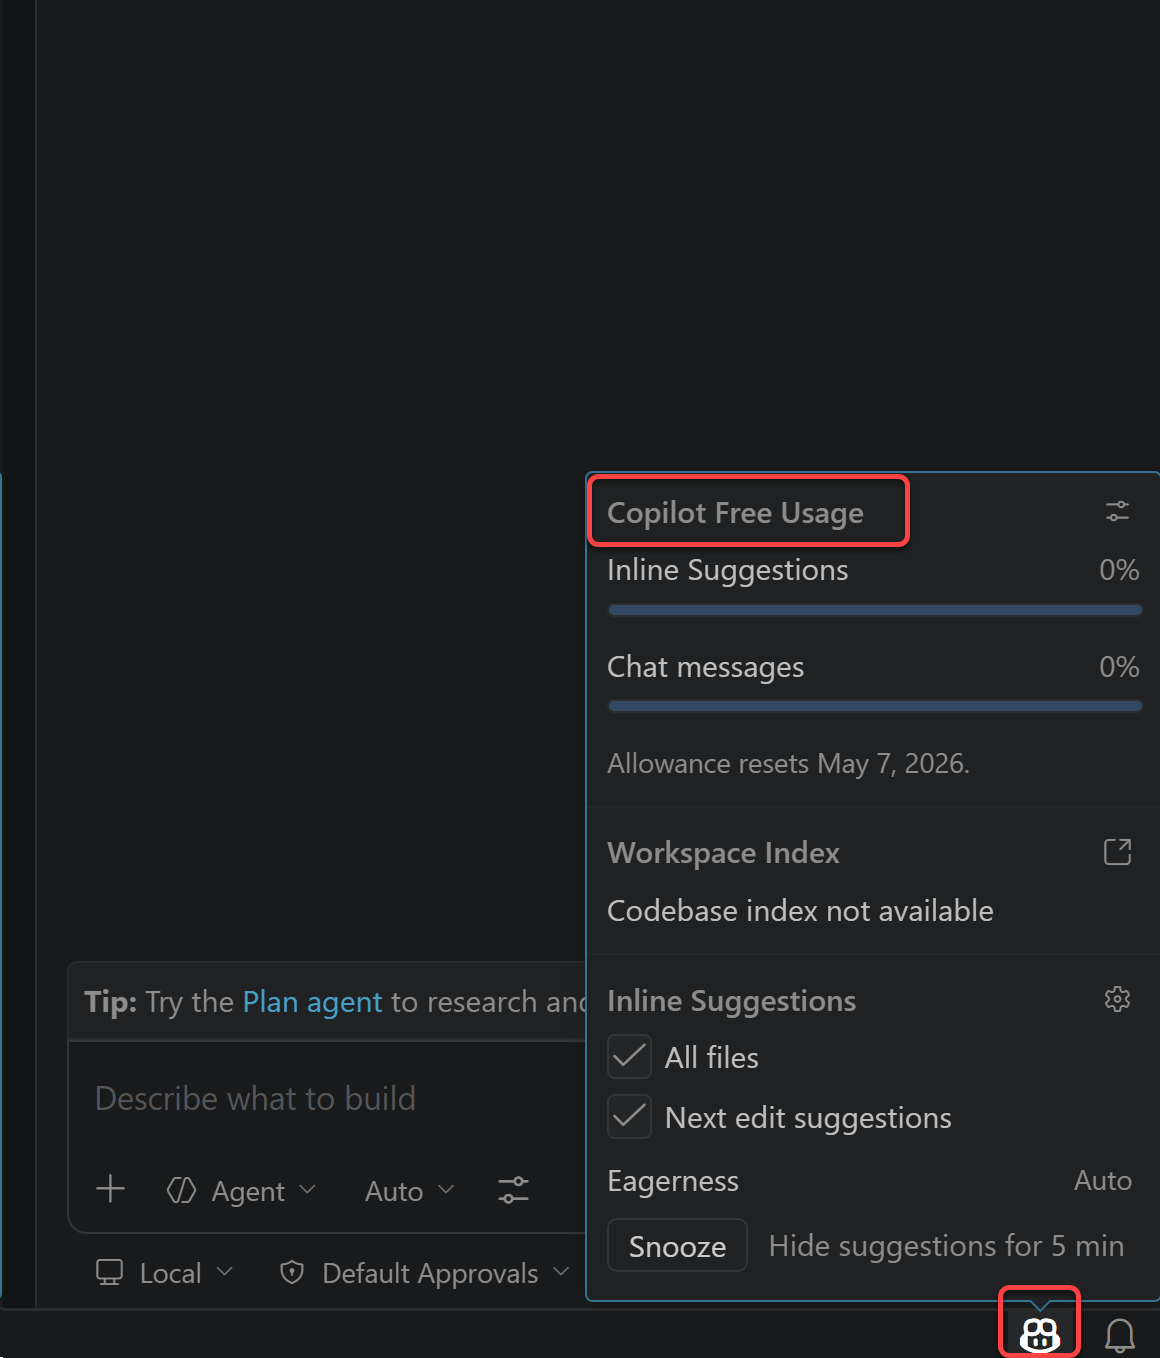
As you see we have used 0% of our credit.
Configure Tools
We already covered the extension and MCP installation earlier, so I do not want to repeat those steps here. At this point, what matters is that you open the Tools section in Copilot Chat and confirm that the MCP servers you installed are now visible there as available tools. If you can see the relevant Power BI or Fabric MCP entries here, then VS Code and GitHub Copilot are now connected to the capabilities we want to use in the next steps.
Select the powerbi-modeling-mcp. If you do not see the tools available under the MCP server, click tht Update Tools option. Do not forget to click the OK button to confirm the tools selection.

Configure Tools for GitHub Copilot in VS Code
Check the Available AI Models
Click the Model Picker dropdown to see which AI models are available on our current plan, which for now is the free plan. The main list shows the most common models, with Auto selected by default. In this mode, GitHub Copilot chooses a suitable model for the prompt. If you click Other Models, you can see the additional models that are available under the same plan. You will also notice the 1x label next to them, which shows the usage multiplier. Because we are using the free plan here, the available models are currently shown with a 1x multiplier.
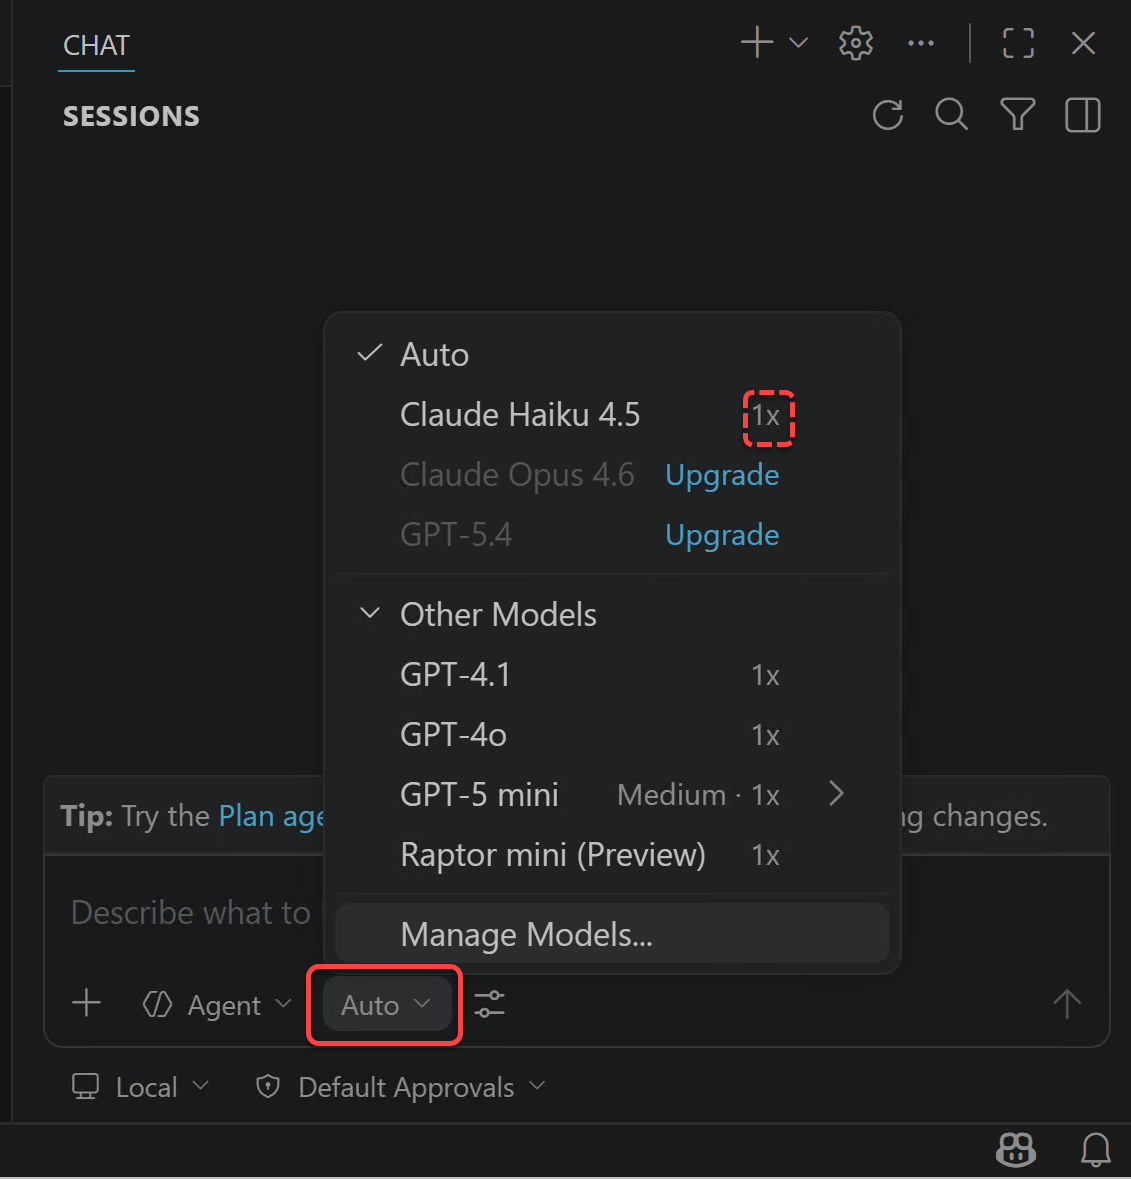
AI Model Picker in VS Code’s Copilot
Set Agent
This step needs a bit more explanation, because the dropdown can be misleading at first. Even though the button currently says Agent, the items in that list are all agents. The difference is not that one is an agent and the others are not. The real difference is how each agent is defined, which instructions it follows, and which tools it can use.
That point matters a lot. In VS Code, agents can be configured with different tool access. For example, a planning agent can be limited to read-only tools, while an implementation agent can have editing tools. This is one of the reasons the agent picker is important. It is not just a cosmetic choice. It changes how Copilot will work. If you want the official overview of agents and agent types, read more here.
In my setup, after installing the extensions and MCP servers, the picker shows the following options:

Available options in the Copilot agent picker
For this blog, I suggest thinking about the available agents in a very simple workflow:
- Ask: This is where I usually start. I use it to explain the problem, clarify the requirement, provide context, and make sure the model understands what I am trying to do. This is a very important step, especially in a new project or when starting a new feature. The Ask agent is for understanding and guidance. It is not the agent I rely on for making file changes.
- Plan: After the requirement is clear enough, I move to Plan. This agent is there to turn the requirement into a structured set of steps before implementation starts. This is important because it helps surface missing assumptions, open questions, and the general shape of the work before any edits happen. In other words, the plan agent makes a task blueprint before action.
- Agent: Once the requirement is clearer and the plan is good enough, I switch to Agent. This is the implementation-focused agent. This is the one that can use the broader toolset to actually carry out the task, such as editing files, using available tools, and working through the steps.
- Fabric: This option is added by the Microsoft Fabric extension. It is still an agent, but it is a more specialised one. Its purpose is to help Microsoft Fabric users work with the Fabric platform from VS Code through MCP tools, including workspace operations, item management, OneLake storage, and real-time analytics scenarios. In my setup, this agent uses Claude Opus 4.5 as its default model unless I change it.
- Configure Custom Agents: This is the place for creating or managing your own agents. I am deliberately not going deeper into that here, because it adds another level of complexity and is outside the scope of this post. If I later want to shape Copilot further at repository level, for example with repository-specific guidance, read more here.
So the simple workflow I want to teach in this series is:
- Ask for the requirement, context, and problem framing
- Plan for the steps
- Agent for the task execution
Of course, more complex work may involve more phases, more review, or more iteration between these steps. But for now, this is the simplest practical workflow that I think works well. In the next blog, when we use this in a real example, this will become much clearer.
Set Session Target
There is another dropdown in the chat window that is easy to miss at first. This is the Session Target picker. While the agent picker decides how the AI should behave, the session target decides where the agent runs.

Available session target options in the Copilot chat window
At the time of writing, the options shown in my setup are:
- Local: This runs the agent inside VS Code on the local machine. It can work with the current workspace, the editor context, the installed extensions, and the MCP tools available in VS Code. For the type of Power BI and Fabric work I cover in this series, this is the most practical starting point.
- Copilot CLI: This runs the agent through the Copilot CLI on the local machine. It is useful when we want an agent to continue running in the background while we keep working on something else. It is powerful, but I do not think it is the best place to start.
- Cloud: This runs the agent remotely. This can be useful for more autonomous workflows, especially when the work is connected to GitHub repositories and pull requests. But it is usually less suitable when the task depends heavily on local editor context, local files, and local MCP tooling.
- Claude: This is a third-party agent target. In other words, VS Code can hand the task to an external agent provider instead of using only the built-in local or cloud targets.
So, if the agent picker is about the agent’s role, the session target is about the execution environment.
For this blog, I strongly recommend keeping the session target on Local. The reason is simple. Here we want to work directly inside VS Code with our current files, our installed extensions, and our MCP servers. That is exactly the scenario where the local target makes the most sense.
Later on, as we become more comfortable with the workflow, the other targets may become useful as well. But at this stage, changing too many things at once can make the learning process harder than it needs to be.
Set Permissions
There is one more control in the chat window that matters a lot for safe agentic work. This is the Permissions picker. If the session target decides where the agent runs, the permissions setting decides how much freedom the agent has when it wants to use tools.

Available permission options in the Copilot chat window
At the time of writing, the options shown in my setup are:
- Default Approvals: This uses the configured approval settings. In practice, this means some safe or read-only actions can run more easily, while more sensitive actions still require approval. For this blog, this is the setting I prefer because it keeps the workflow practical without removing the safety checks.
- Bypass Approvals: This automatically approves all tool calls. That can make the workflow faster, but it also removes an important checkpoint before actions are taken. For early experiments, especially with local tools and MCP servers, I do not think this is the best default.
- Autopilot (Preview): This goes even further. It can iterate more autonomously from start to finish, including handling approvals and continuing the workflow with less interruption. This is interesting, but it also increases the need for trust, isolation, and careful review.
This is one of those places where it is worth staying conservative. Earlier in this blog I already explained why I prefer testing MCP-based workflows in an isolated environment first. The permissions setting is closely related to that same idea. More autonomy can be useful, but it also increases risk. If you want the official explanation of the permission levels, read more here.
For the setup in this post, I recommend keeping the permissions on Default Approvals. It gives us a good balance. The agent can still be useful, but important actions are less likely to happen silently. That is exactly the behaviour I want at this stage.
GitHub Copilot Free
One of the best things about the current state of GitHub Copilot is that we can start using it for free. That is a very important step because it lowers the barrier to entry quite a lot. It means we can learn the workflow, understand the UI, test the extensions, connect MCP tools, and get familiar with the overall experience without committing to a paid plan from day one.
At the same time, it is important to keep the limitations in mind. A free account is perfectly fine for learning and for smaller experiments, but the usage limits are lower, and some models or more advanced capabilities are not available in the same way as they are on paid plans. So, I see the free plan as the right entry point, but not always the right long-term option for daily work. For the latest plans and details, read more here.
GitHub Copilot Paid
Once we move beyond early exploration, a paid plan may make sense depending on usage patterns, limits, and the types of models or workflows we need. This is usually the point where the question changes from “Can I try it?” to “Can I depend on it regularly as part of my development workflow?” This is when the paid options become more relevant. In my view, the real value of a paid plan is not only more usage. It is also the confidence that the workflow can remain available when it becomes part of regular project work rather than just occasional experimentation.
For this blog, however, I still strongly recommend starting with the free option first, getting comfortable with the workflow, and only then deciding whether more is actually needed. I think that order keeps the learning process much simpler and more accessible to most people.
What Comes Next
At this point, the setup is ready. In the next blog, I go through a real hands-on workflow using GitHub Copilot, Ask mode, Plan mode, Agent mode, and the Power BI Modeling MCP Server to implement a real-world scenario in a semantic model.
Up to this point, my focus has been on building a safe and workable environment. In the next blog, the focus shifts to using that environment in a real task and seeing how the workflow actually feels in practice.
Final Thoughts
If there is one message I want this blog to leave behind, it is this: start small, stay grounded, and be intentional. There is no real value in connecting every possible tool on the day first. There is also no need to automate everything immediately. A smaller setup that is understood properly is much more useful than a larger setup that feels impressive but cannot be trusted yet. That is why I prefer adding capabilities gradually, checking what each extension or MCP server actually does, and keeping the approvals and safety boundaries in place while learning. It may feel slower in the first hour or so, but it is usually much faster in the long run.
You can follow me on LinkedIn, YouTube, Bluesky, and X, where I share more content around Power BI, Microsoft Fabric, and real-world data and analytics projects.
Discover more from BI Insight
Subscribe to get the latest posts sent to your email.

