
A while back, I published a blogpost explaining how to use Azure LogicApps to automate scaling Microsoft Fabric F capacities under the PAYG (Pay-As-You-Go) licensing option. Some of my followers reported an issue with their Capacity Admin settings when running the LogicApp solution. The issue was that their capacity admins disappeared after they had run the LogicApps to upscale or downscale the capacity. After some investigation, I found out what the problem was. At the same time, some of my other followers suggested a fix which involved hardcoding the admins into the solution. While this would work in some cases, it is not a practical solution in the long run, as the admin settings may evolve over time. This makes the solution hard to maintain and unreliable. Back then, I suggested using the APIs and an HTTP action in a new LogicApps solution. This blog is the continuation of the previous blog and a quick and easy fix that ensures the automation runs smoothly with minimal to no manual work or maintenance afterwards. I have also published a tutorial video on YouTube explaining the process from the beginning (which was already covered in my previous blog, so I do not explain it here again) which you can watch here:
A Reminder of the Previous Solution
I suggest you read my blog about automating Fabric capacity scaling with Azure LogicApps as it provides a step-by-step guide to implement the solution. But if you have already implemented, or you are just after the fix, jump to the next section. The following image shows how the original solution works:
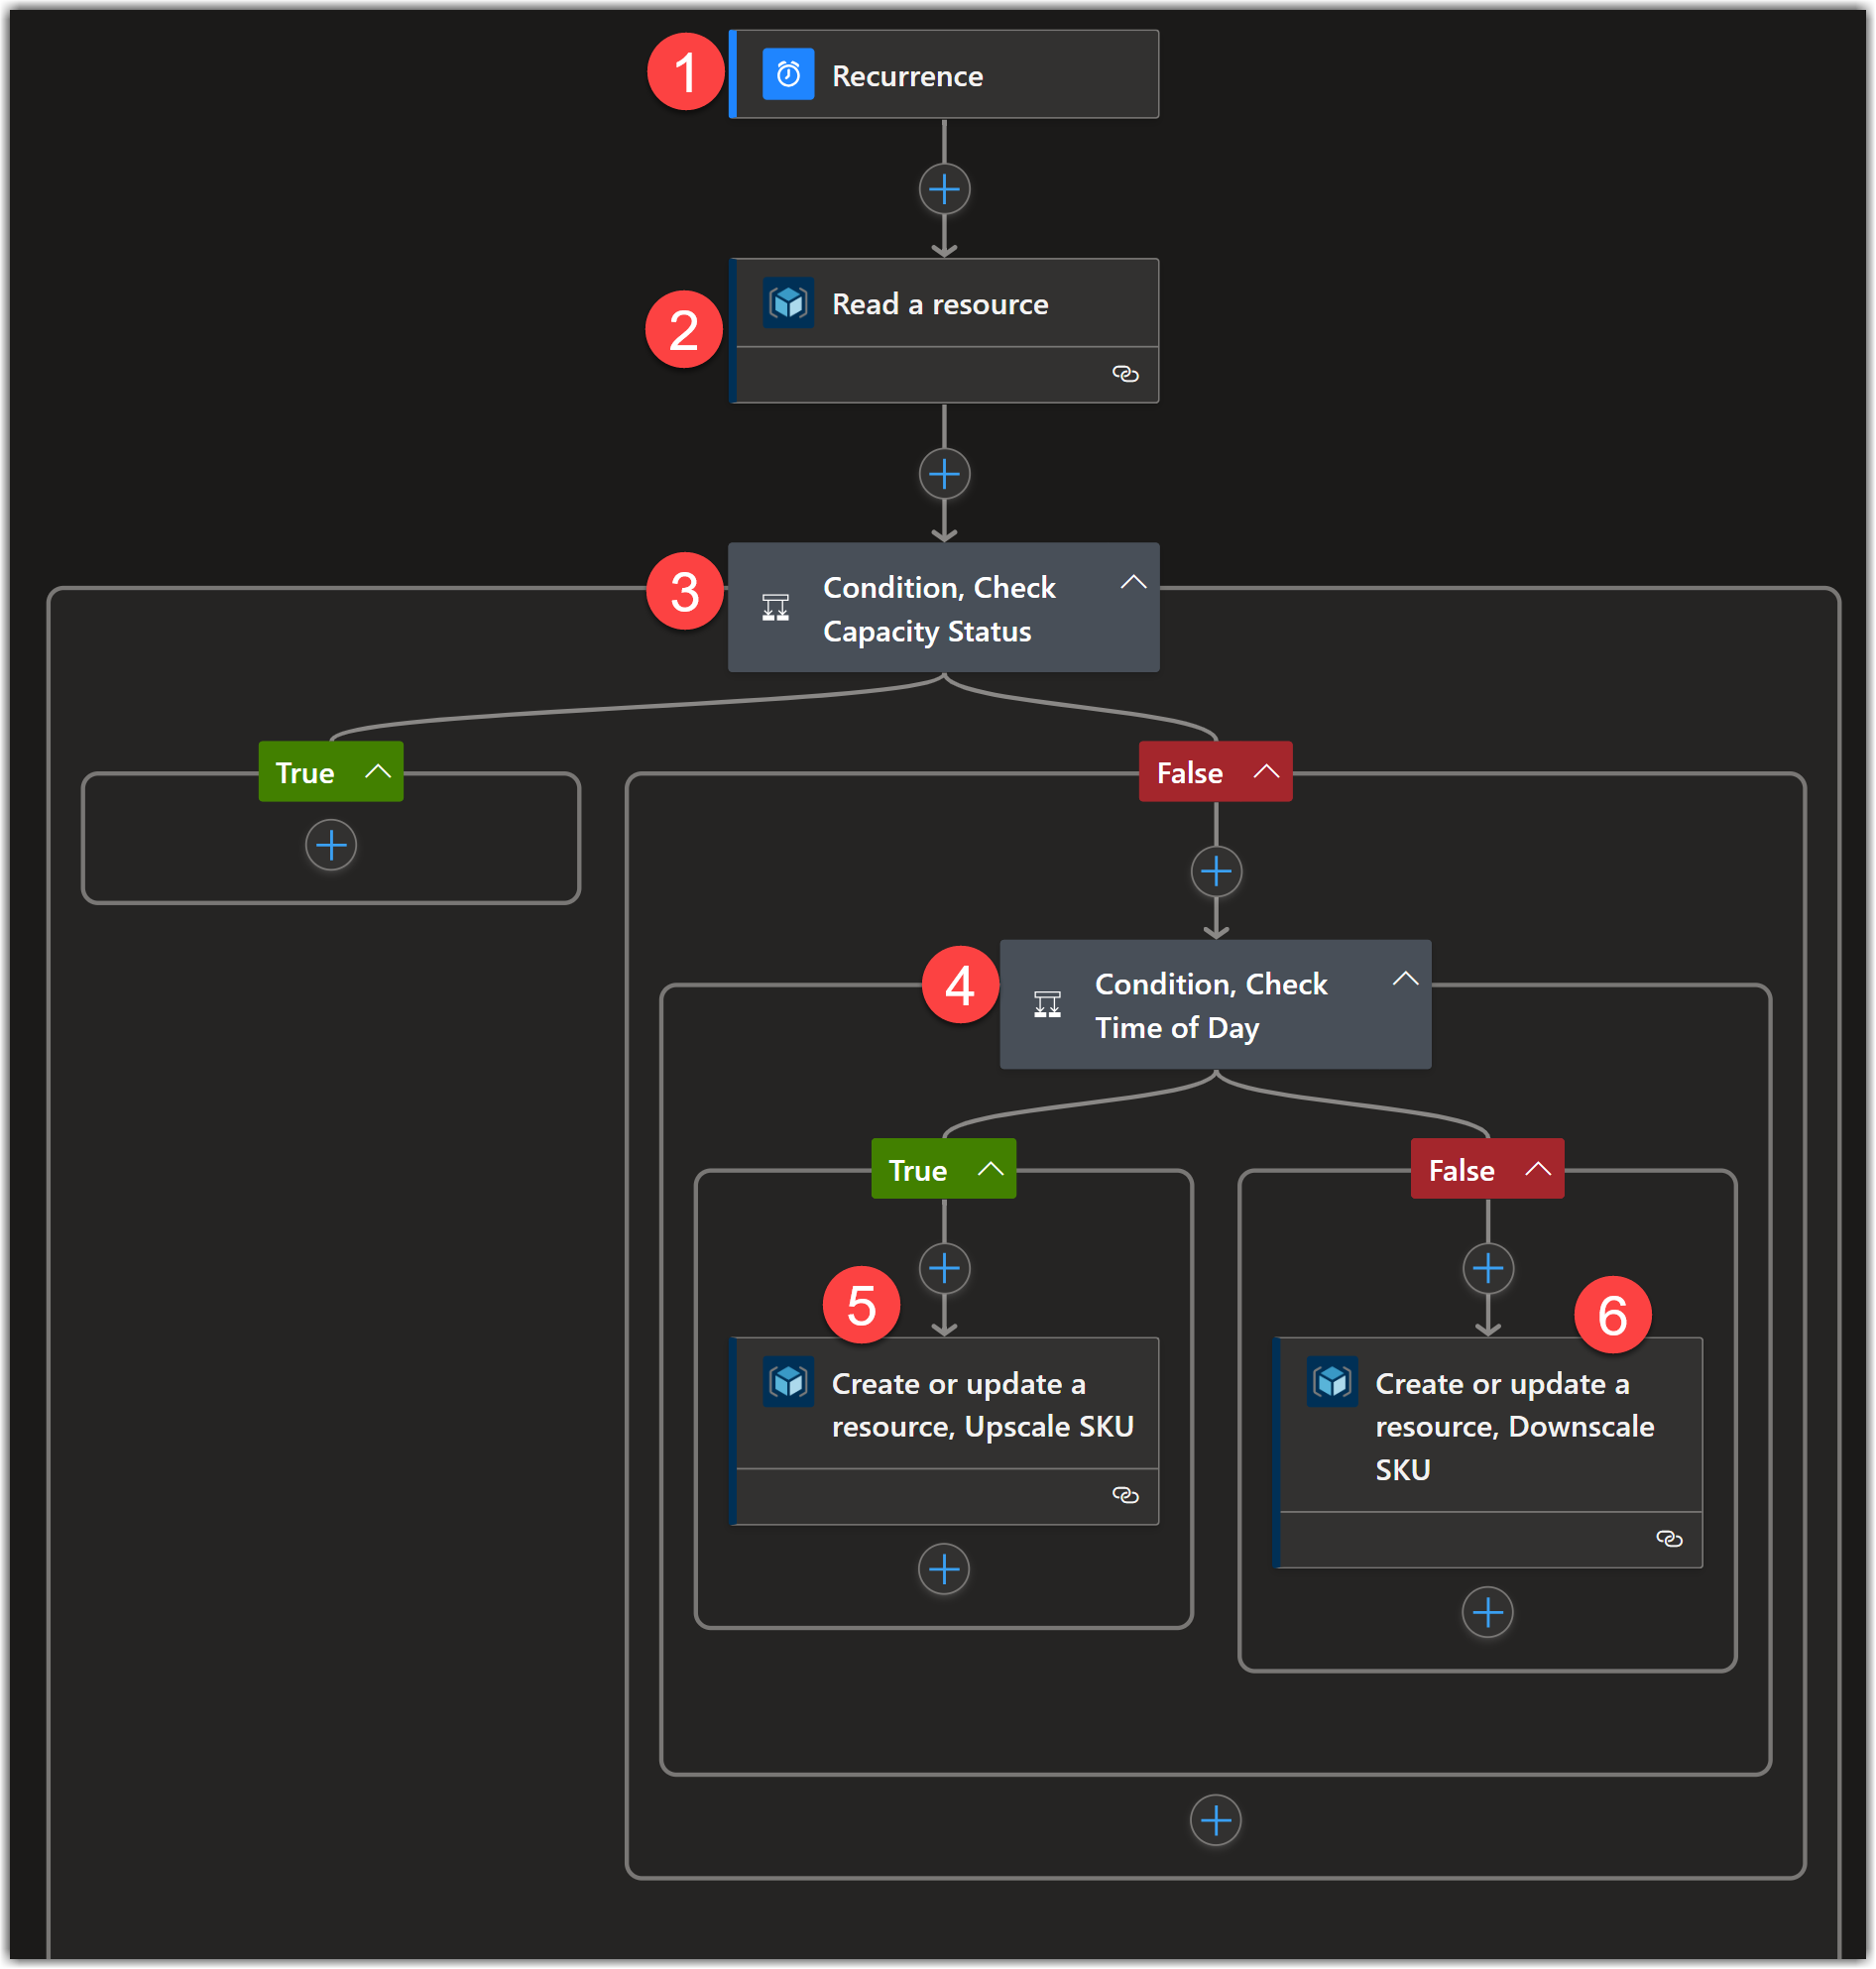
Here is a quick explanation of how it works:
- The Trigger runs the workflow automatically every hour.
- The Read a Resource, which is an Azure Resource Manager operation, reveals information about a resource that, in our implementation, is a Microsoft Fabric Capacity.
- A condition to check the Status of the capacity. If the capacity is Paused (the condition is true), then do nothing. This is needed as this method only works when the capacity is Active.
- If the capacity is Active (the condition is false), then check the current time to see if it is between 2pm and 4pm. This is the timeframe for which we want to upscale the capacity.
- If the condition is True, then upscale the capacity to F8 using another ARM operation: Create or update a resource.
- If the condition is False, then set the capacity SKU to F2.
The solution works fine if you do not have any Capacity Admin settings either on Azure Portal or on Admin Portal on Microsoft Fabric. But in many cases, we indeed have capacity admins. Let’s see what the issue is.
The Problem
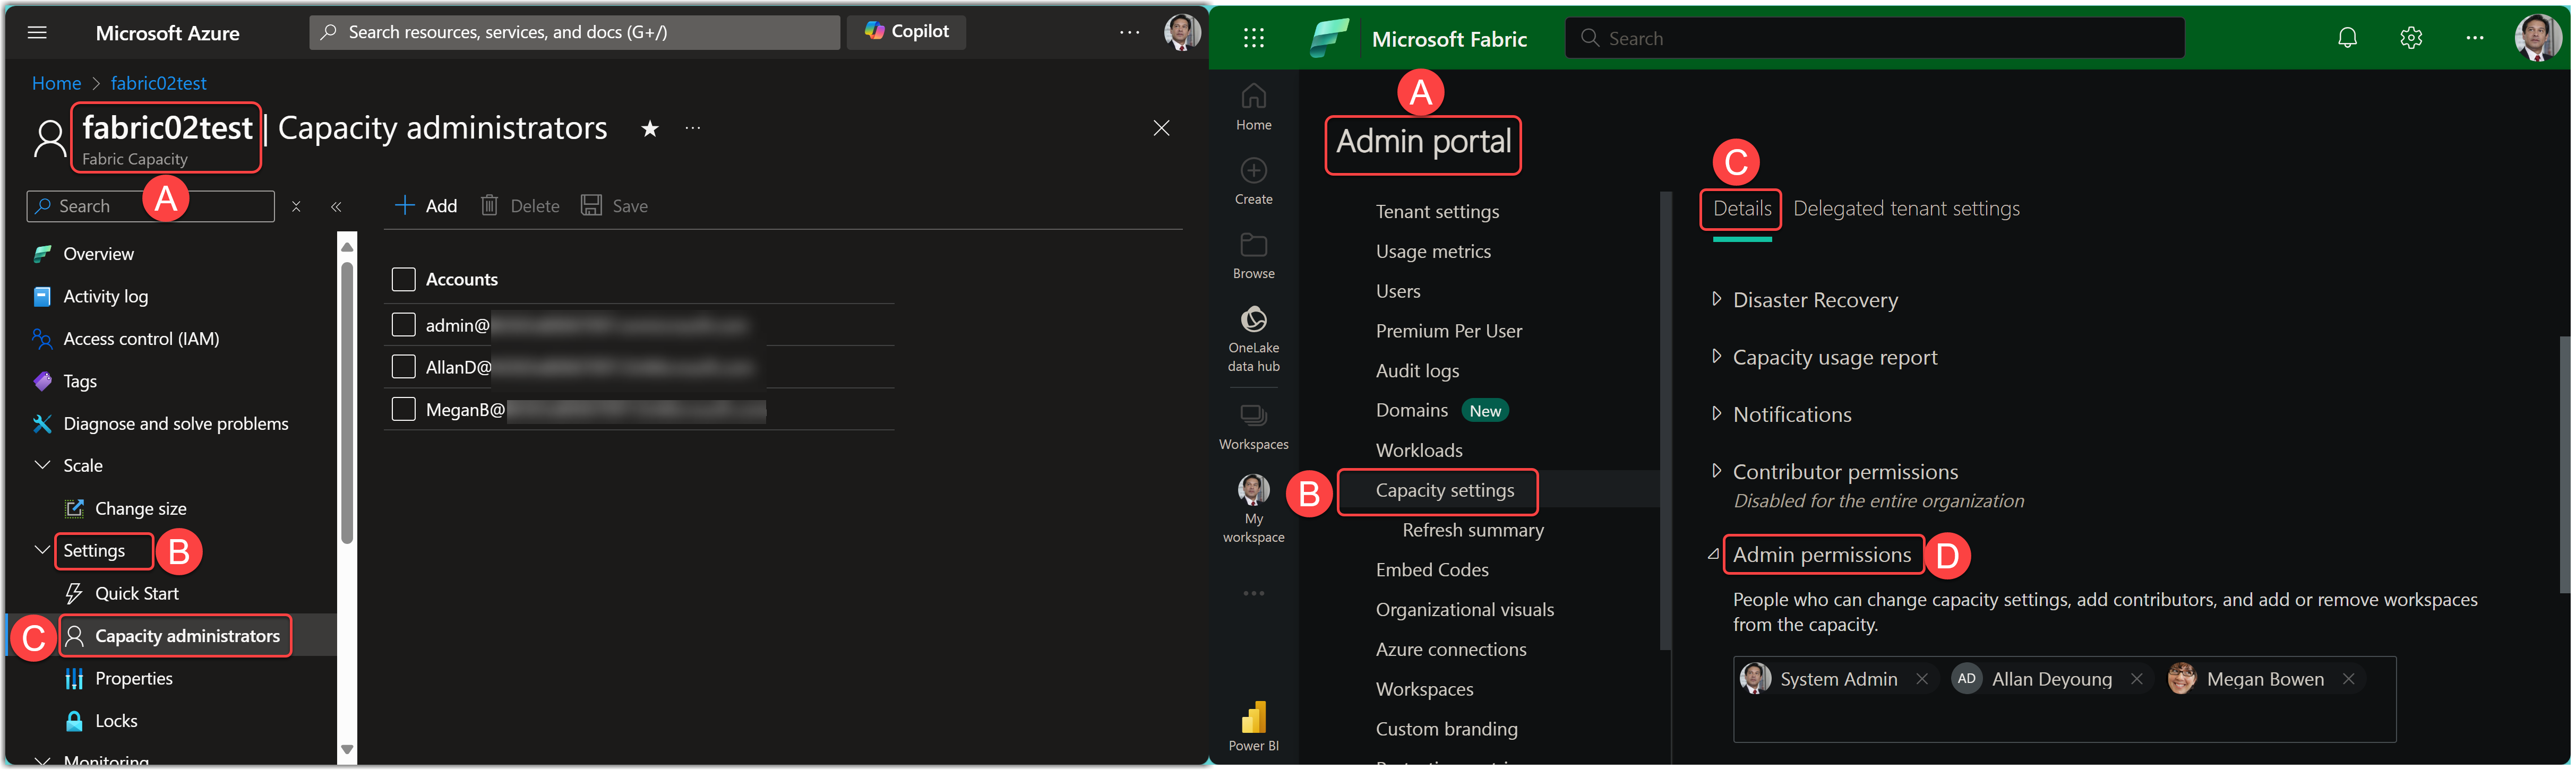
The issue arises when we add some capacity administrators; that are wiped after running the above solution in its current implementation. The following image shows the Capacity Admin settings on both portals:
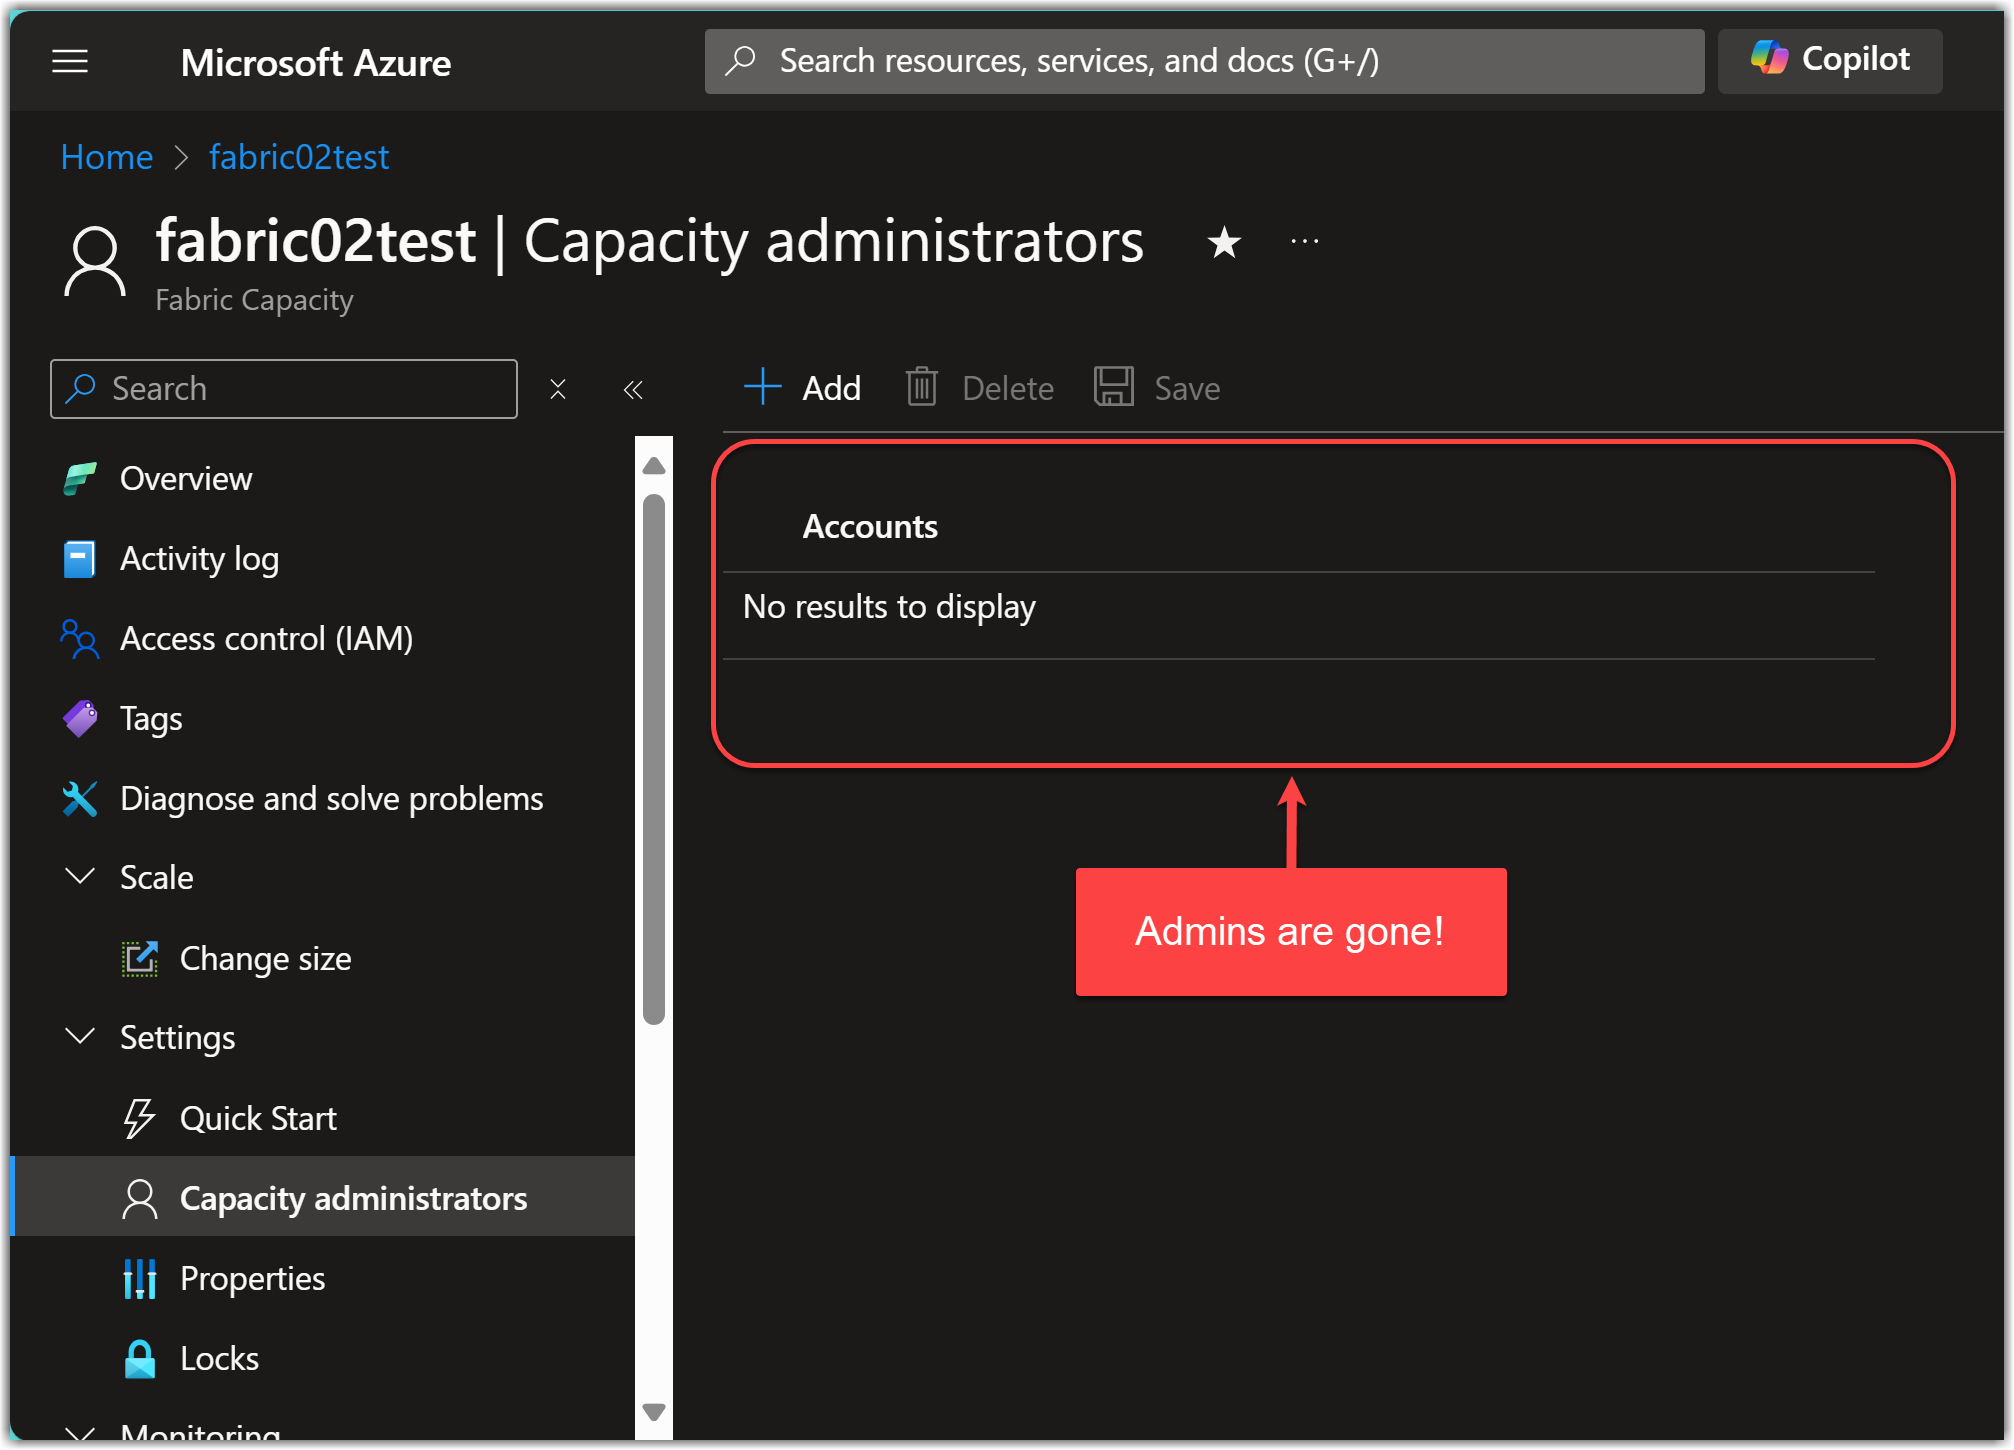
The reason if that the Create or update a resource also updates the properties of the resource with the ones we define in LogicApps. Therefore, if we do not add any capacity admins, we literally empty the existing capacity admins. Let’s run the solution again to understand why this is happening. The following image shows my capacity admins are wiped out after running my LogicApp workflow:
The issue is also demonstrated in the tutorial video on YouTube:
To understand why this is happening, we need to look into the Run History of the LogicApps. So go back to LogicApps and select the latest run, and click the Read a resource step. Scroll down to the OUTPUTS section and observe the body section. The following image shows my run history:
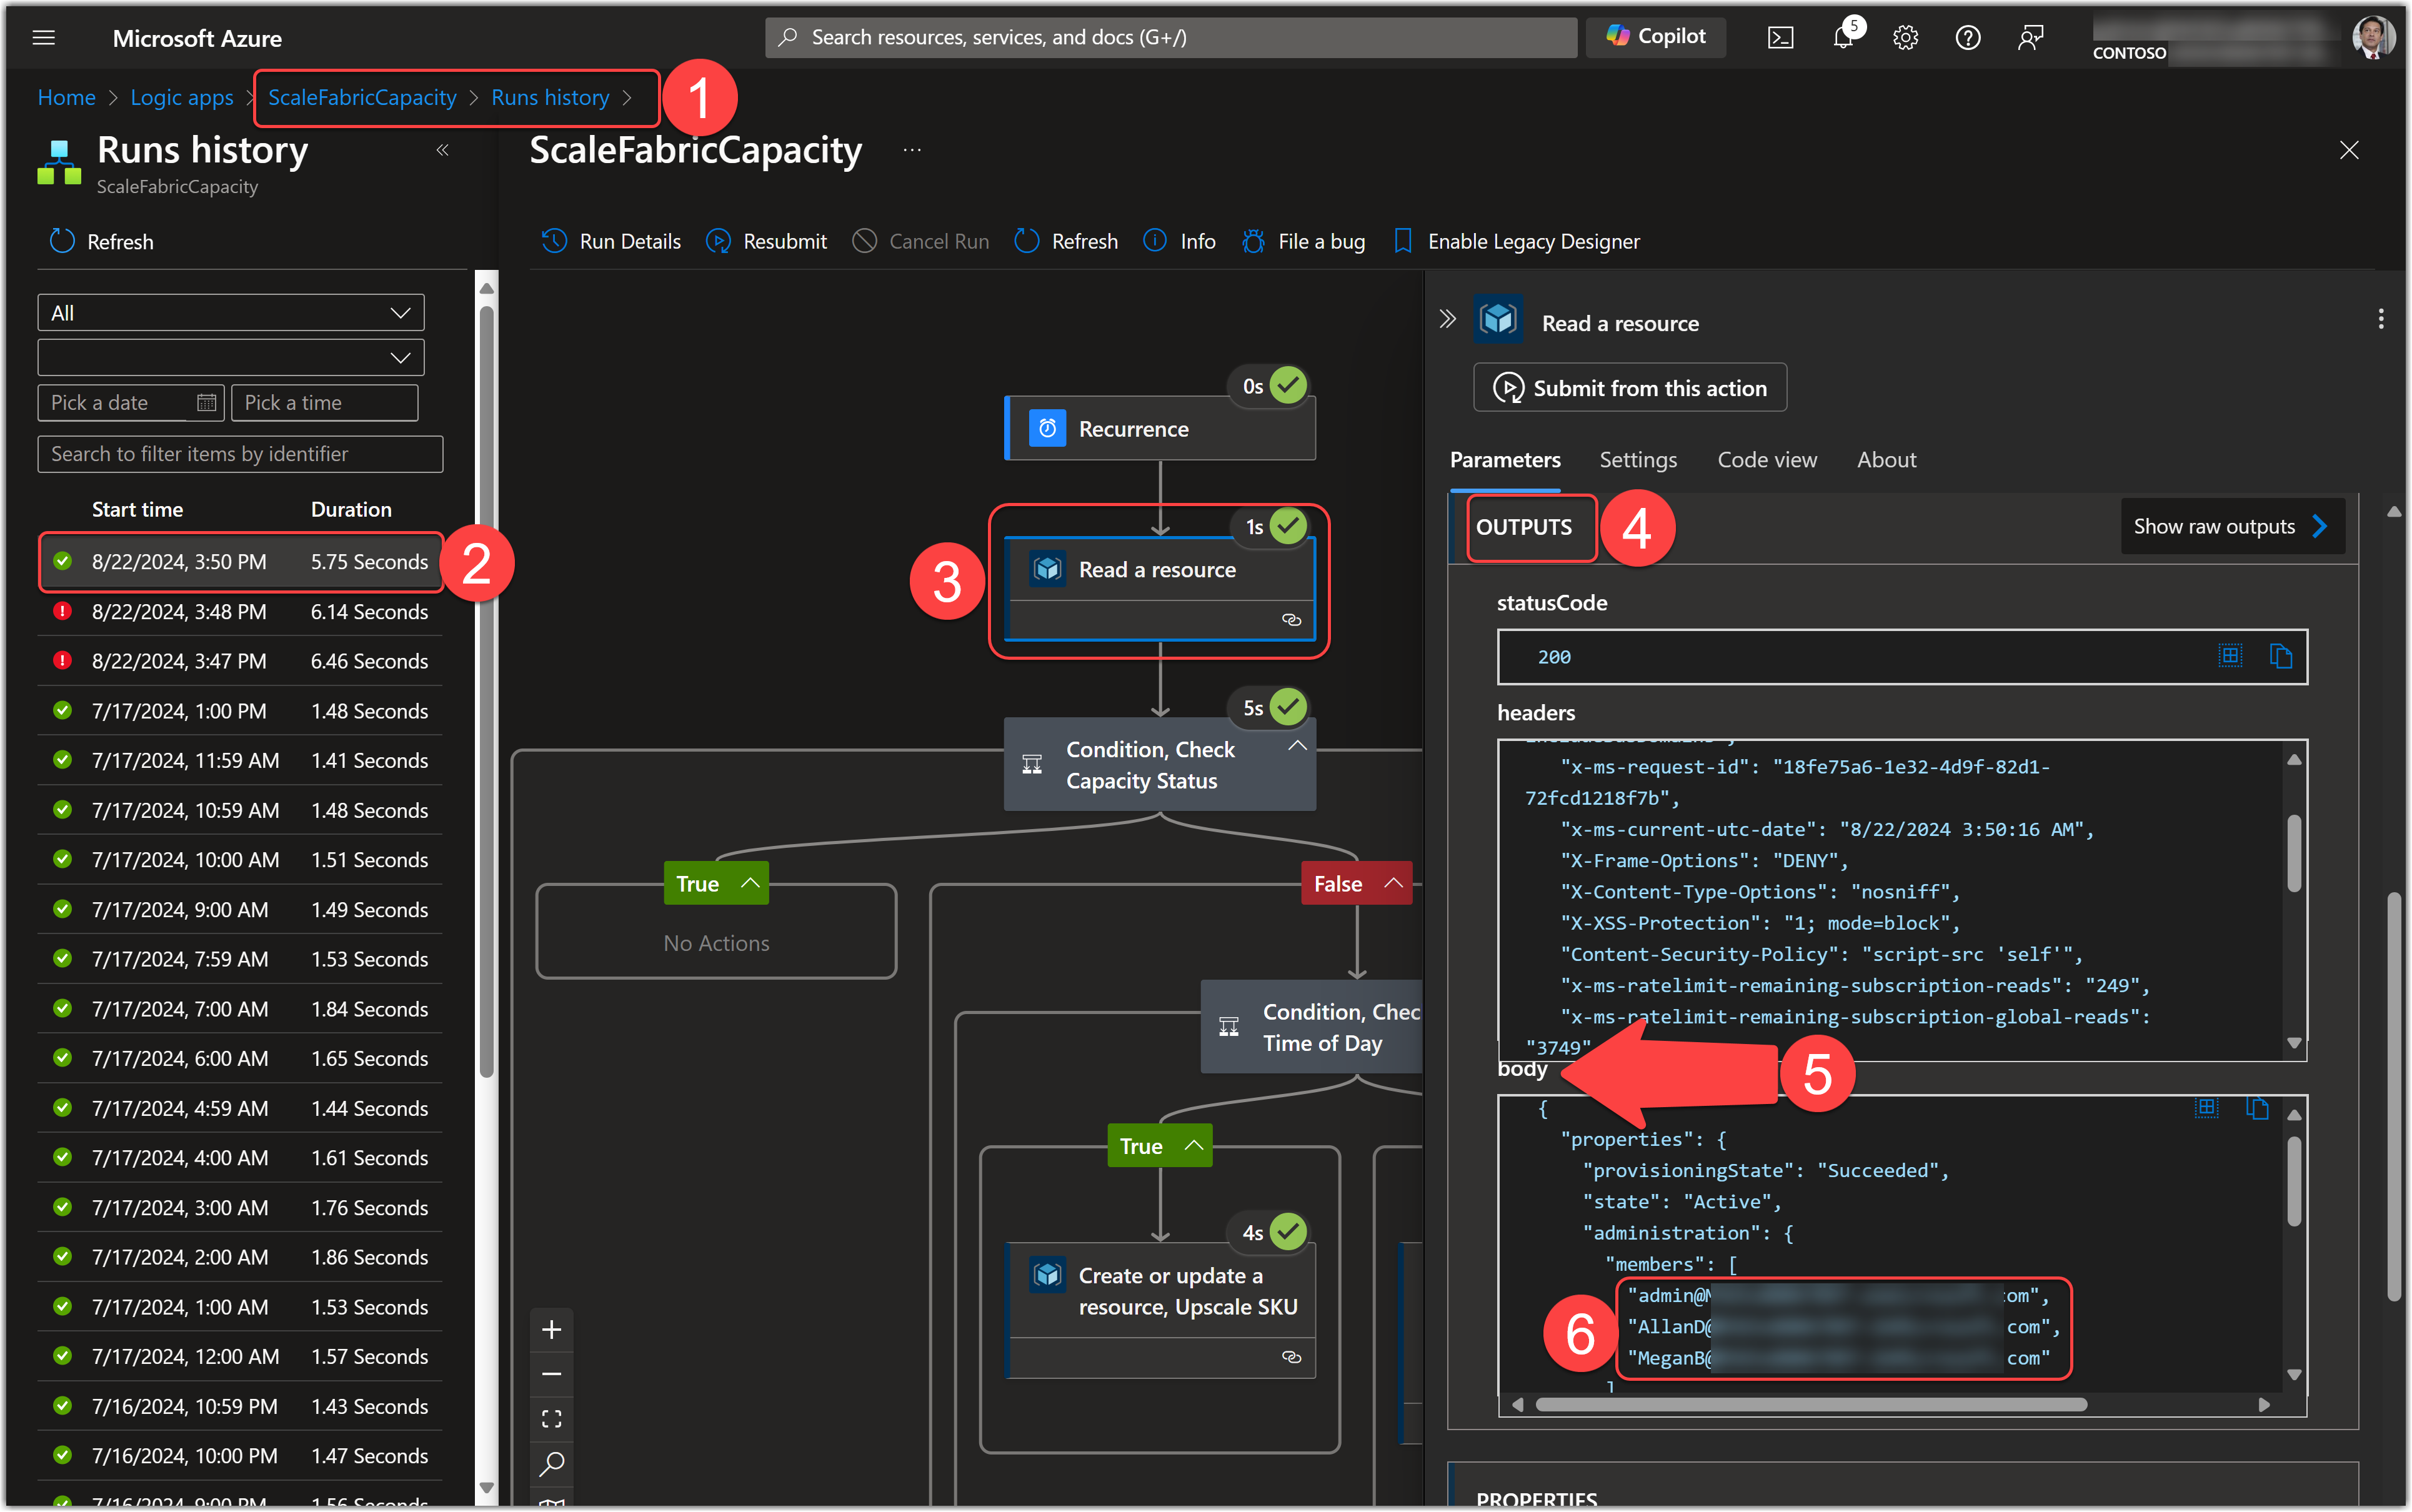
As the preceding image shows, the capacity properties include the current capacity admins. When we scroll down, we see more information about the capacity, as shown in the following image:
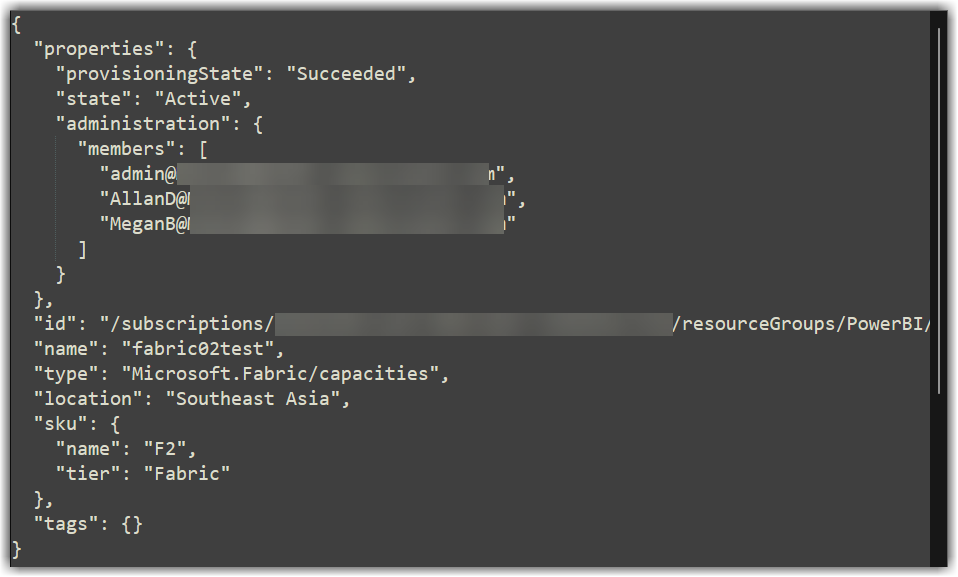
So, we are effectively overwriting these properties in our solution using the Create or update a resource operation. Let’s click the Create or update a resource, Upscale SKU and have a look at the body section of its run information’s OUTPUT:

And… here is the entire output:

As you can see, we are indeed removing the admin members and the tags, if any. That is why we see that the admins are wiped out. Not only that, but everything else that we do not add will be overwritten.
Now that we know what the issue is let’s fix it.
Fix the Issue
The fix is indeed pretty simple. We build upon our previous implementation. As we discussed before, the Read a resource operation reveals information about the capacity’s properties, including its status, admin members, SKUs, tags and more. So we can read the admin members and use them in the Create or update a resource operation. To do so, we need to add Properties from the Advanced parameters on the Create or update a resource operation. This parameter accepts JSON format as follows:
{
 "administration": {
      "members": [
        "USER1@DOMAIN_NAME",
        "USER2@DOMAIN_NAME",
        "USER3@DOMAIN_NAME"
      ]
    }
}
In the preceding code, the members key accepts an array.
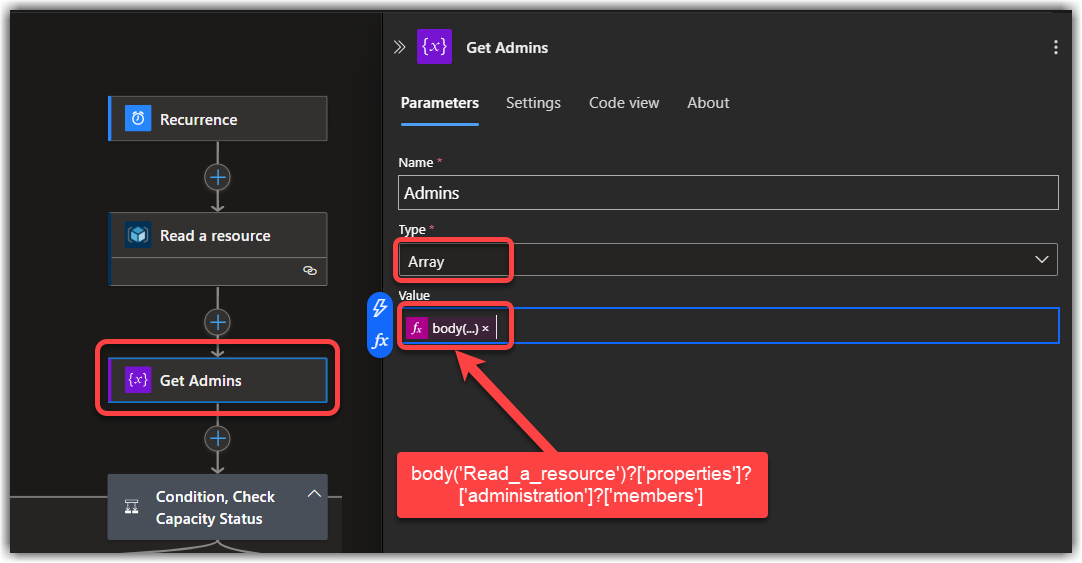
The following expression provides an array of members from the Read a resource operation’s Admins:
body('Read_a_resource')?['properties']?['administration']?['members']So, I just need to add an Initialize variable operation after the Read a resource operation, set its Type to and use the above expression in its Value as shown in the following image:
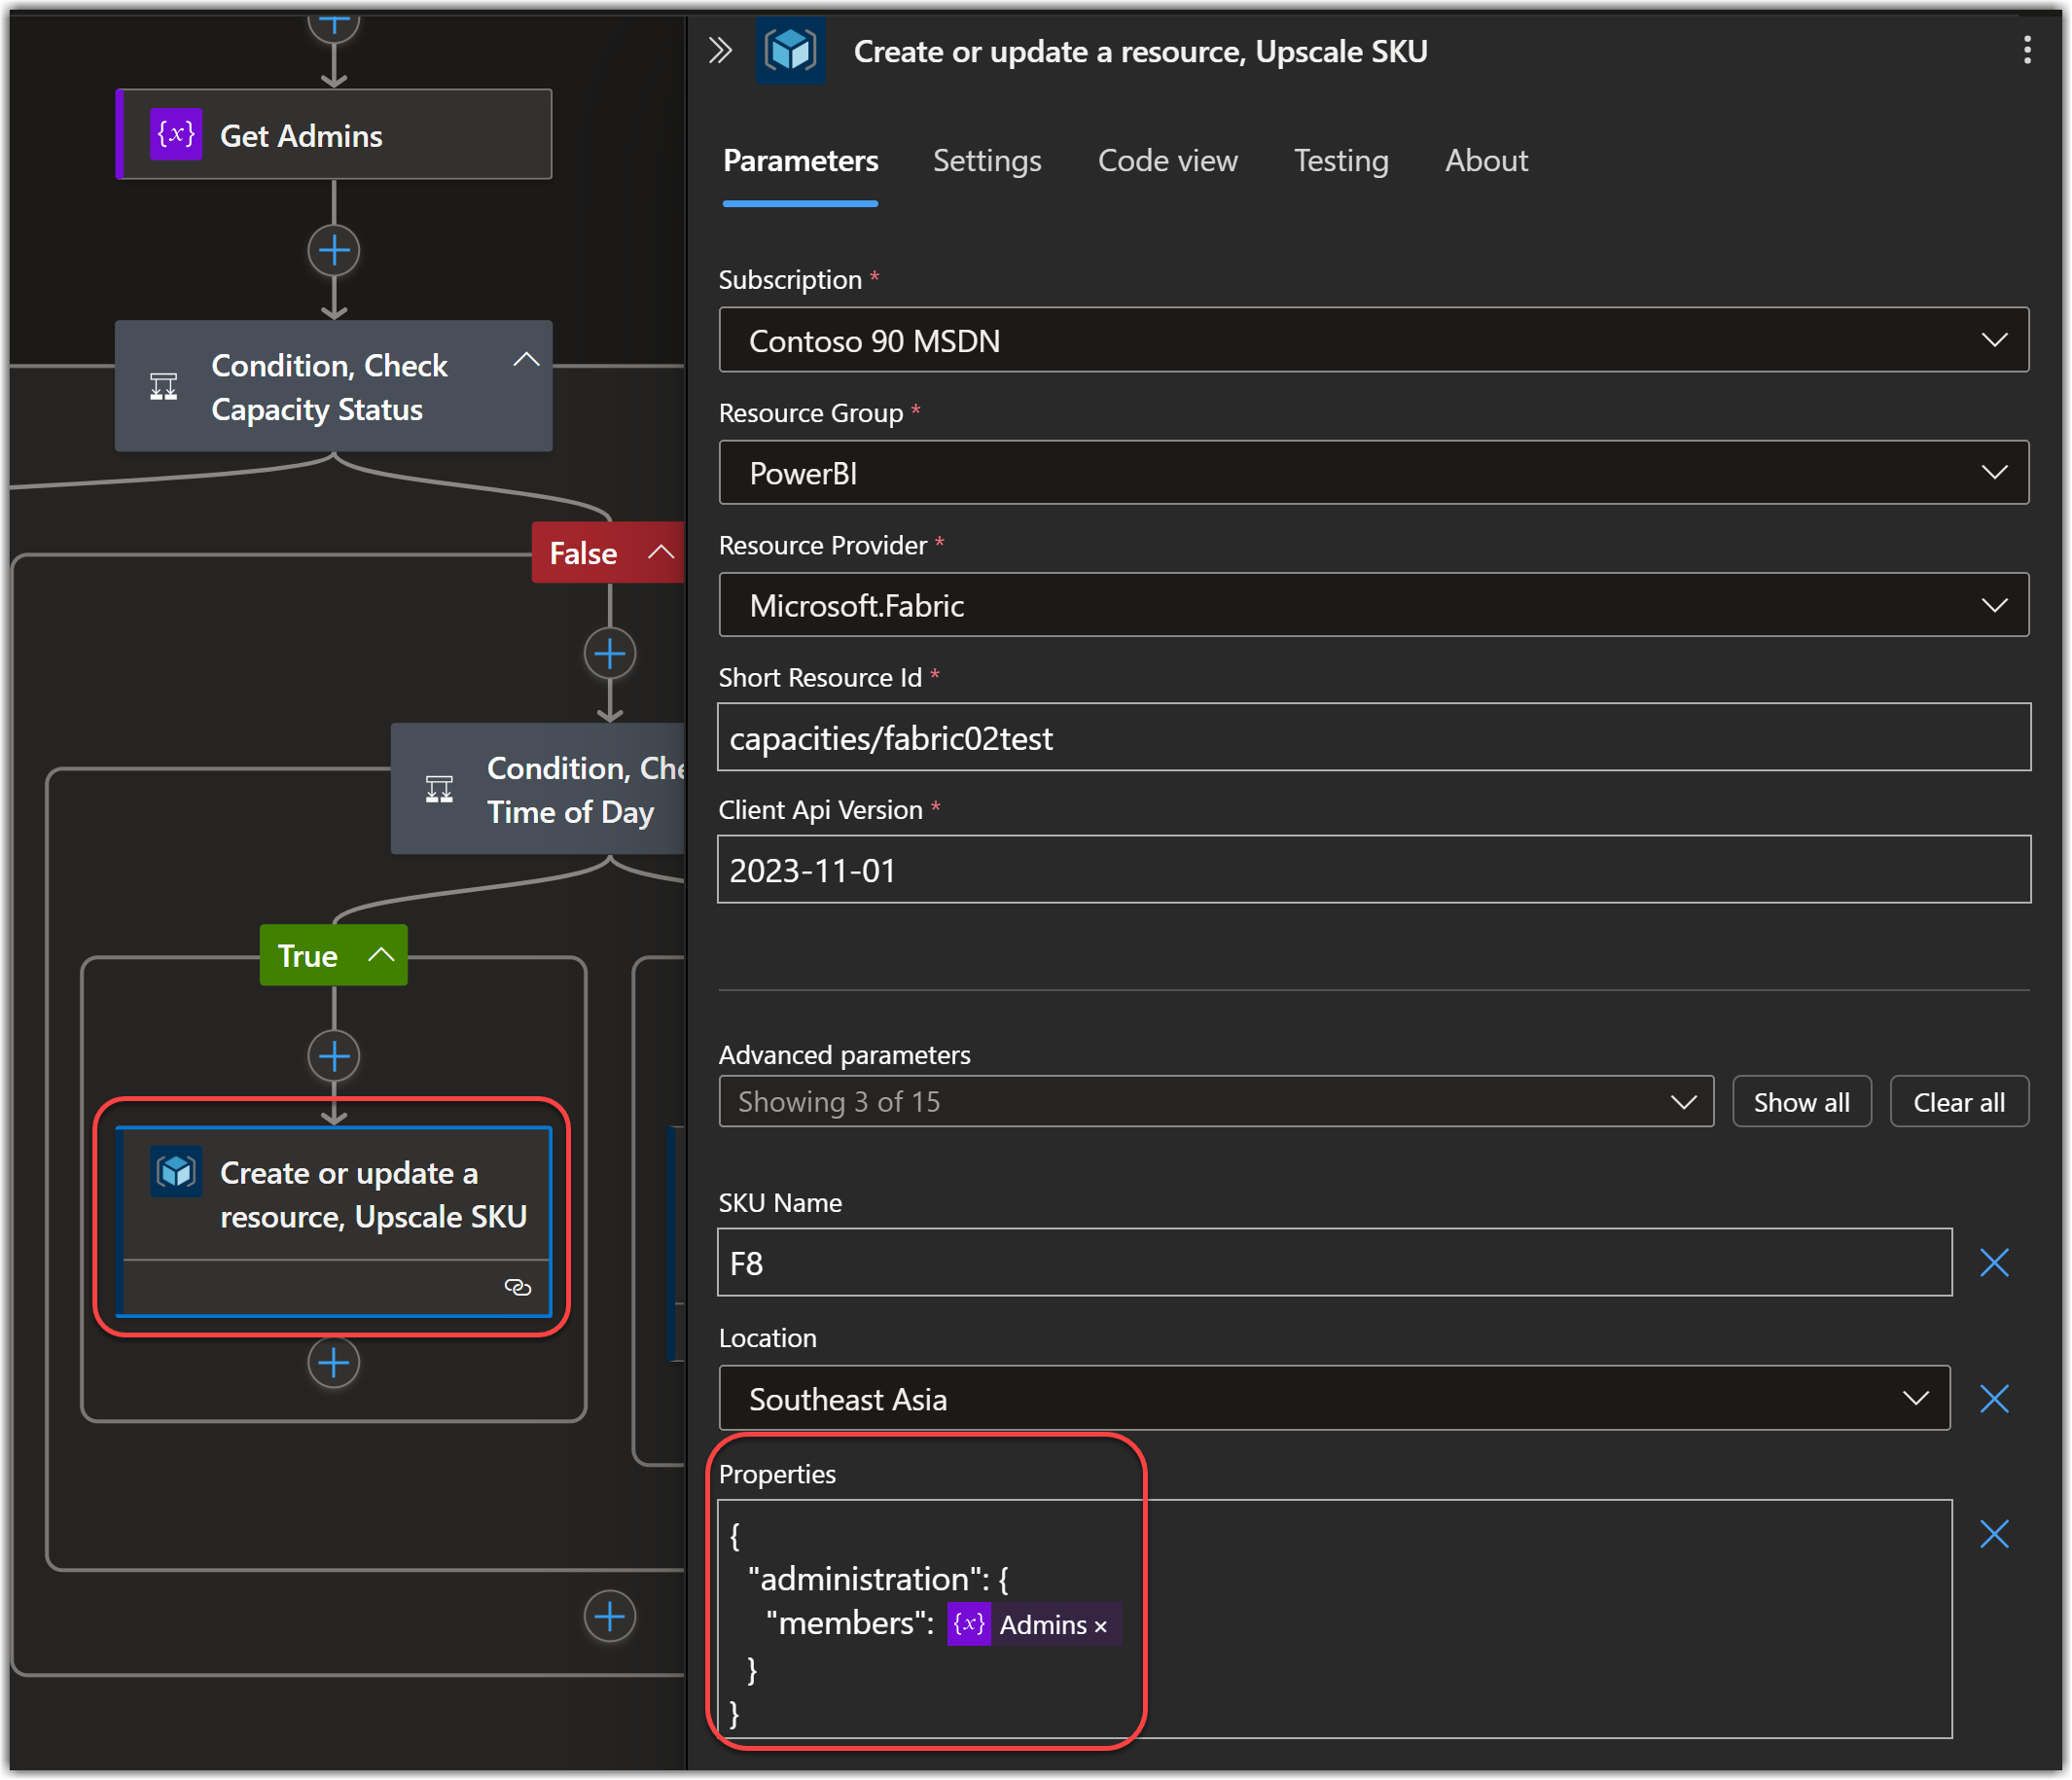
The only remaining part of the puzzle is to call the value of this variable in the Properties parameter of the Create or update a resource operation. Since we have two of these operations in our solution, we need to add the Properties parameter to both, as shown in the following image:
You can watch the troubleshooting here on my YouTube channel:
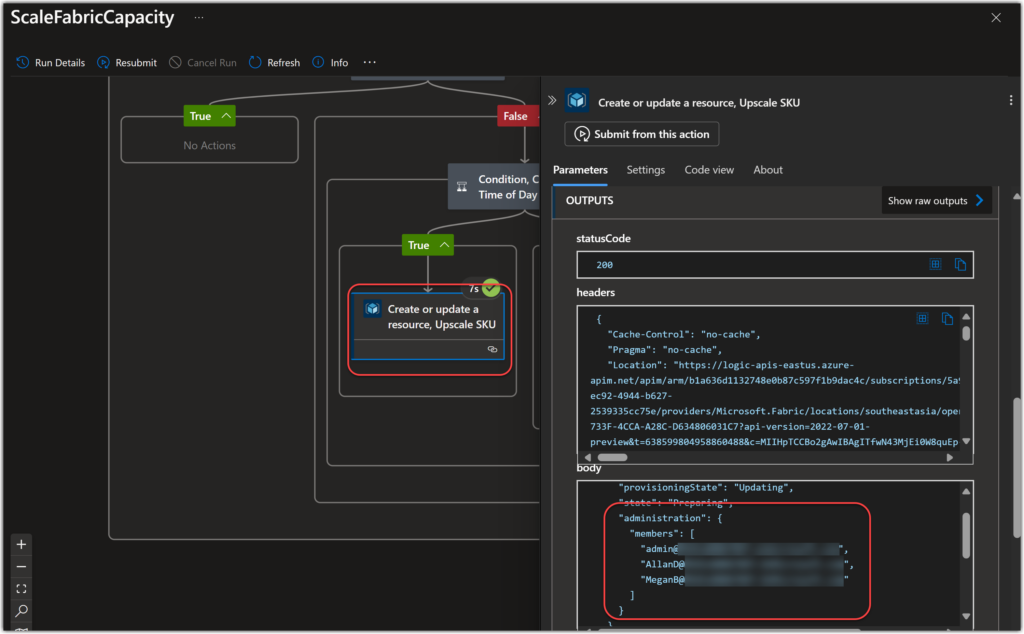
The workflow now runs as expected. The following image shows the results of the run history after making the change:
Conclusion
In this blog, we addressed the issue of Capacity Admin settings being wiped during the automation of Microsoft Fabric capacities using Azure Logic Apps. By integrating the reading and reapplying of admin member configurations into our Logic Apps workflow, we developed a solution that maintains essential settings without manual intervention. This fix ensures our automation processes are not only efficient but also preserve the integrity of existing configurations.
As always, I hope you have learned something new by reading this blog. If you have, do not forget to subscribe and leave your comments below.
Follow me on LinkedIn, YouTube, and @_SoheilBakhshi on X (formerly Twitter).
Discover more from BI Insight
Subscribe to get the latest posts sent to your email.